Product Photography Lighting Techniques for Enhanced Appeal
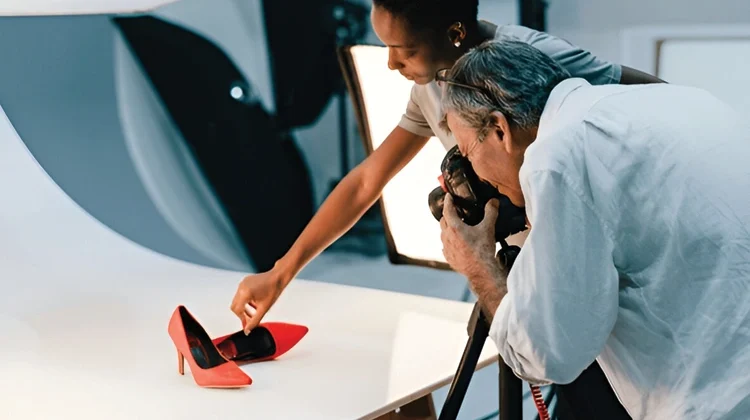
In the realm of e-commerce, where first impressions are paramount, the visual appeal of a product can be the deciding factor in a customer’s buying. High-quality product photography is essential, and lighting is its cornerstone. By mastering product photography lighting techniques, you can elevate your product images, captivating your audience and driving sales. This comprehensive guide will delve into the intricacies of lighting, equipping you with the knowledge to create stunning visuals that showcase your products.
Understanding prizing Lightning
Lighting plays a pivotal role in product photography, influencing how your products are perceived. It shapes the mood and highlights textures and colors. Effective lighting can transform an ordinary product into an irresistible visual masterpiece. Poor lighting can obscure details, create unwanted shadows, and diminish the overall impact of your image.
Essential Lighting Equipment
Before diving into techniques, it’s crucial to have the right tools. While natural light can be used, controlled studio lighting offers greater precision and consistency. Consider investing in the following equipment:
- Soft-boxes: These diffuse lights create a softer and more flattering effect.
- Light Stands: give stability and flexibility for positioning your light sources.
- Reflectors: Bounce light back onto the filling in shadows.
- Diffuses: Reduce light intensity and create a softer look.
- Light Meters: make sure correct exposure and color temperature.
Core Lighting Techniques
- Single-Light Setup:
- Ideal for simple product shots.
- Position the light source at a 45-degree angle to the product to create depth and dimension.
- Use a reflector to fill in shadows and enhance overall brightness.
- Two-Light Setup:
- Offers more control over lighting direction and intensity.
- Place one light as the key light, positioned at a 45-degree angle.
- Use a second light as a fill light, positioned opposite the key light to soften shadows.
- Three-Light Setup:
- Provides the greatest control for complex products.
- Use a key light for the light and backlight to separate the product from the background.
Lighting Styles for Unique Products
- Jewelry: Emphasize sparkle and clarity by combining soft and hard light. Use a light box or white background to isolate the product.
- Fashion: Create a mood and atmosphere through lighting. Experiment with different angles and light intensities to highlight textures and details.
- Beauty Products: Showcase product features. Use soft, diffused light to avoid harsh shadows on the skin.
- Food: Entice the appetite with rich, appetizing images. Use warm-toned lights to enhance colors and textures.
Advanced Lighting Techniques
- Rim Lighting: Create a dramatic silhouette by placing a light behind the product.
- Product Hero Shot: Isolate the product on a clean background using a joint main, fill, and backlight.
- Lifestyle Photography: Integrate the product into a scene, using natural or artificial light to create a realistic and engaging image.
Tips for Optimal Lighting
- Color Temperature: keep a consistent color temperature throughout your shoot for correct color representation.
- White Balance: Correctly adjust the white balance to prevent color casts.
- Shadow Control: Balance shadows and highlights to prevent areas of darkness or blown-out details.
- Experimentation: Don’t be afraid to experiment with different lighting setups and angles to find the perfect look for your products.
Overcoming Common Lighting Challenges in Product Photography
While understanding the fundamentals of product photography lighting is essential, every product presents unique challenges. Let’s explore some common issues and how to overcome them:
Reflective Surfaces
Products with reflective surfaces, like glass or metal, can be particularly tricky to light. Here are some tips:
- Polarizing Filters: These can reduce glare and reflections.
- Soft Light: Use soft-boxes or diffuses to minimize harsh reflections.
- Black Background: A black background can help absorb reflections.
- Angle Manipulation: Experiment with different angles to avoid capturing unwanted reflections.
Transparent Products
Capturing the essence of transparent products requires careful lighting:
- Back-lighting: Highlight the product’s shape and form by placing a light behind it.
- Side Lighting: Create depth and dimension by adding side lighting.
- White Background: A white background can help showcase the product’s clarity.
- Product Placement: Consider placing the product on a reflective surface to enhance its appearance.
Small Products
Photographing small items can be challenging due to their delicate nature and limited details:
- Macro Lens: Invest in a macro lens to capture intricate details.
- Light Tent: Use a light tent to create even illumination and reduce shadow.
- Focus Stacking: Combine multiple images with different focus points to achieve maximum sharpness.
- Careful Composition: Emphasize the product’s unique features through careful framing.
Overcoming Shadows
Unwanted shadows can detract from the product’s appeal. Here’s how to manage them:
- Fill Light: Use a fill light to soften shadows and add dimension.
- Reflectors: Bounce light back onto the product to reduce shadow intensity.
- Light Placement: Experiment with different light positions to control shadow placement.
- Post-processing: Use photo editing software to gently reduce shadows if necessary.
Achieving Consistent Lighting
Maintaining consistent lighting is crucial for product photography, especially when shooting a series of images:
- Light Meter: Use a light meter to measure and maintain consistent exposure.
- White Balance: Carefully adjust the white balance to ensure accurate color reproduction.
- Calibration: Calibrate your camera and monitor for accurate color representation.
- Consistent Setup: Maintain the same lighting setup for all product shots.
Conclusion
Mastering product photography lighting is an ongoing process. By understanding the fundamentals, experimenting with different techniques, and addressing common challenges, you can create stunning visuals that effectively showcase your products. Remember, practice makes perfect, so continue to refine your skills and explore new lighting possibilities.


