Beyond the Basics: Exploring Different Lighting Setups for Various
Lighting is often an overlooked aspect of photography and videography. While understanding the basics of exposure is crucial, delving deeper into lighting techniques can elevate your work to new heights. This article explores various lighting setups, providing insights into how to harness light to create different moods, atmospheres, and visual effects.
Understanding the Fundamentals
Before diving into specific setups, let’s revisit the fundamental lighting concepts:
- Key Light: The primary light source, providing the most illumination in the area.
- Fill Light: A secondary light source used to soften shadows created by the key light.
- Backlight: A light positioned behind them, separating them from the background and creating a halo effect.
- Light Quality: Refers to the hardness or softness of light, influenced by the light source’s size and distance.
- Light Direction: The angle at which light strikes the impacting the mood and dimension.
Lighting Setups for Portraits
- Classic Three-Point Lighting: This timeless setup comprises a key light, fill light, and backlight. The key light is positioned at a 45-degree angle while the fill light softens shadows and the backlight adds separation.
- Rembrandt Lighting: Characterized by a triangular shadow under the eye, Rembrandt lighting creates a dramatic and chiaroscuro effect. It’s achieved by positioning the key light high and to the side.
- Butterfly Lighting: This setup places the key light above them, creating a shadow under the nose resembling a butterfly. It’s ideal for glamorous and high-fashion portraits.
- Loop Lighting: like butterfly lighting, but with the key light positioned higher and to the side, loop lighting creates a small loop of light under the eye.
- Split Lighting: This dramatic setup divides the face into equal parts light and shadow, creating a strong and mysterious look.
Lighting Setups for Product Photography
- Classic Product Lighting: A simple yet effective setup involves two light sources placed on either side of the product. This creates even illumination and minimizes shadows.
- Beauty Dish Lighting: A beauty dish softens light while providing a flattering catching light in the eyes. It’s ideal for showcasing product details.
- Soft-box Lighting: Soft-boxes produce diffused light, perfect for reducing harsh shadows and creating a soft, even illumination on the product.
- Light Tent: A light tent is a portable enclosure with built-in light sources, providing consistent lighting for small products.
- Macro Lighting: For close-up photography, dedicated macro lighting equipment is essential to illuminate tiny details with precision.
Lighting Setups for Video
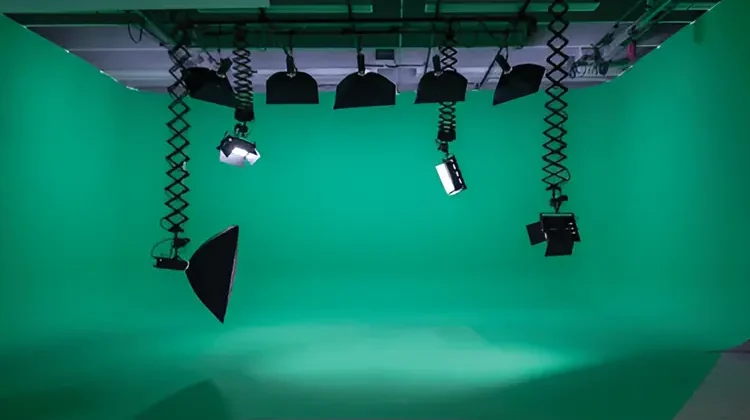
- Three-Point Lighting: While like portrait lighting, video requires more attention to light consistency and color temperature.
- High-Key Lighting: Used for creating a bright and cheerful atmosphere, high-key lighting involves using a significant amount of fill light to reduce shadows.
- Low-Key Lighting: For dramatic and moody videos, low-key lighting emphasizes shadows and contrast.
- Natural Light: using available daylight can create a natural and authentic look. But be mindful of changing light conditions and shadows.
Lighting Setups for Events
- Ambient Lighting: Existing lighting in the venue can be supplemented with additional fixtures to create a desired atmosphere.
- Key Light and Fill Light: A basic setup for event photography involves a key light to illuminate the subjects and a fill light to soften shadows.
- Backdrop Lighting: Back-lighting the backdrop can add depth and dimension to event photos.
Lighting Modifiers
To shape and control light, various lighting modifiers can be used:
- Soft boxes: Diffuse light for a softer quality.
- Beauty Dishes: Create a flattering, even light with a slight catch light.
- Reflectors: Bounce light back onto the subject to fill shadows.
- Diffuses: Reduce light intensity and create a softer effect.
- Gels: Color light to match different environments or create specific moods.
Experimentation and Creativity
While understanding lighting setups is essential, experimentation is key to developing your unique style. Don’t be afraid to try different combinations of lights, modifiers, and angles. Observe how light interacts with your subjects and use that knowledge to create captivating images and videos.
Lighting for Specific Genres and Challenges
Lighting for Fashion Photography
Fashion photography demands a high level of visual impact. To achieve this, consider these lighting techniques:
- High-Key Fashion: Create a glamorous and ethereal atmosphere with ample soft light. Use large soft boxes or beauty dishes to illuminate the model.
- Low-Key Fashion: For a dramatic and moody look, employ low-key lighting. Use a single key light with strong shadows for a striking contrast.
- Dramatic back-lighting: Highlight the model’s silhouette and create a sense of mystery by placing the key light behind the subject.
Lighting for Food Photography
Food photography is all about making the subject look appetizing. Key lighting techniques include:
- Natural Light: Utilize soft, diffused natural light from a window for a classic and inviting look.
- Window Light with Reflectors: Combine window light with reflectors to fill shadows and enhance colors.
- Studio Lighting: For precise control, use studio lights with soft boxes or beauty dishes to create a desired mood.
- Back-lighting: Highlight the transparency and texture of food items by using back-lighting.
Lighting for Outdoor Photography
Outdoor photography presents unique challenges due to changing light conditions. Consider these approaches:
- Golden Hour: Leverage the soft, warm light of the golden hour for stunning portraits and landscapes.
- Fill Flash: Use fill flash to balance the exposure and add detail in shadows on bright days.
- Overcast Conditions: Utilize reflectors to add light to your subjects and create a softer look.
- Night Photography: Experiment with long exposures to capture the beauty of city lights or star trails.
Lighting Challenges and Solutions
- Overexposed Images: Reduce the light intensity, increase the aperture, or decrease shutter speed. Use neutral density filters to control the amount of light entering the camera.
- Underexposed Images: Increase the light intensity, decrease the aperture, or increase the shutter speed. Use a higher ISO setting if necessary.
- Harsh Shadows: Use fill light or reflectors to soften shadows. Experiment with different light angles.
- Color Casts: Use white balance correction in camera or post-processing to neutralize color shifts.
Conclusion
Mastering lighting is an ongoing process that requires experimentation and practice. By understanding different lighting setups and techniques, you can create captivating images that tell your story. Remember, the key to great lighting is to experiment, observe, and refine your skills over time.


