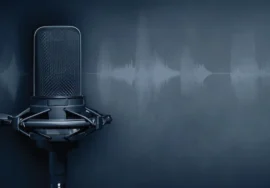
Is Your Audio Lackluster? We Can Fix That
In today’s digital age, audio quality has become important. Whether you’re producing podcasts, creating videos, or recording voice messages, having high-quality audio can enhance your content. But achieving professional-grade audio can be a challenge, especially for those without a background in sound engineering.
In this blog post, we’ll discuss the common issues that can lead to lackluster audio and give practical tips and solutions to help you improve your sound quality.
Common Audio Problems
- Background Noise: One of the most common audio problems is background noise. This can include everything from traffic noise to air conditioning hum to the sound of your keyboard typing. Background noise can distract listeners and can make it difficult to understand what you’re saying.
- Echo: Echo occurs when sound waves bounce off hard surfaces and are reflected to the microphone. This can create a hollow, reverberating sound that can be difficult to listen to.
- Distortion: Distortion occurs when the audio signal is overloaded, causing it to become clipped or distorted. This can cause a harsh sound.
- A variety of factors can cause a lack of clarity: lack of clarity, including poor microphone placement, inadequate soundproofing, and insufficient gain.
Tips for Improving Audio Quality
- Choose the Right Microphone: The choice of microphone can impact the quality of your audio. For example, a condenser microphone is better suited for recording vocals and instruments, while a dynamic microphone is more durable and can be used in louder environments.
- Optimize Your Recording Environment: A quiet, well-insulated recording environment can help to decrease background noise and echo. Consider using soundproofing materials, such as acoustic panels, to absorb sound waves.
- Adjust Microphone Placement: Placing your microphone can also affect the quality of your audio. For example, placing the microphone too close to your mouth can lead to distortion, while placing it too far away can cause a lack of clarity.
- Use Audio Editing Software: Audio editing software can improve the quality of your audio recordings. For example, you can use noise reduction tools to cut background noise, equalization to adjust the frequency balance, and compression to control the dynamic range.
Professional Audio Equipment
If you’re serious about improving your audio quality, investing in professional audio equipment can make a big difference. Here are the essential items to consider:
- Microphone: A high-quality condenser or dynamic microphone.
- Audio meeting: An audio meeting is used to connect your microphone to your computer.
- Studio Headphones: Studio headphones allow you to check your audio recordings.
- Pop Filter: A pop filter helps to prevent plosive sounds from being recorded.
- Microphone Boom Arm: A microphone boom arm can position your microphone in the optimal position.
Added Tips for Improving Audio Quality
1. Experiment with Different Microphone Techniques:
- Off-Axis: Hold the microphone off-axis (to the side) to reduce plosive sounds and add a more natural sound.
- Proximity Effect: Position the microphone closer to your mouth for a warmer, more intimate sound.
- Distance: Experiment with different distances between the microphone and your mouth to find the optimal balance of clarity and proximity effect.
2. Consider Using a Noise Gate:
A noise gate is a device or software plugin that automatically mutes the audio when there is no sound. This can be particularly useful for reducing background noise in noisy environments.
3. Experiment with Different Audio Editing Techniques:
- Equalization: Adjust the frequency balance of your audio to enhance or reduce certain sounds.
- Compression: Control the dynamic range of your audio to reduce volume fluctuations.
- Reverb: Add a sense of space and depth to your audio by using reverb effects.
- Delay: Create rhythmic effects by using delay plugins.
4. Seek Professional Help:
If you’re struggling to achieve the desired audio quality, consider consulting with a professional sound engineer. They can provide expert advice and assistance with equipment selection, recording techniques, and audio editing.
5. Invest in Ongoing Education:
Stay up-to-date with the latest audio technology and techniques by attending workshops, taking online courses, or reading industry publications.
Conclusion
Improving your audio quality doesn’t have to be difficult or expensive. By following the tips and recommendations in this blog post, you can create professional-sounding audio recordings that will captivate your audience. Remember, the key to great audio is attention to detail and a willingness to experiment. With a little effort, you can transform your audio from lackluster to exceptional.
Additional Tips
- Practice Good Microphone Technique: Hold the microphone close to your mouth, but avoid touching it.
- Monitor Your Audio Levels: Ensure that your audio levels are not too high or too low.
- Consider Using a Noise Gate: A noise gate can help to reduce background noise by automatically muting the audio when there is no sound.
- Experiment with Different Microphone Techniques: Try different microphone placements and techniques to find what works best for you.
- Seek Professional Help: If you’re struggling to achieve the desired audio quality, consider consulting with a professional sound engineer.
By following these tips and investing in the right equipment, you can take your audio to the next level.